자주 묻는 질문
Synap Editor를 붙이고 설정하고 다듬는 데 필요한 기술 답변입니다. 도구 모음 설정부터 실시간 공동 편집, 이미지 업로드, 라이선스까지 다룹니다.
질문 33개 표시
찾은 결과가 없습니다. 다른 검색어로 찾아보세요.
설명
synapeditor.config.js.기본값으로
customList 스타일이 글머리 기호 기능에 적용됩니다.적용 방법
synapeditor.config.js:'editor.toolbar': [
'new', 'open', 'template', 'layout', '|',
'contentsProperties', '|',
'undo', 'redo', '|',
'copy', 'cut', 'paste', '|',
'link', 'unlink', 'bookmark', '|',
'image', 'background', 'video', 'file', '|',
'table', 'div', 'horizontalLine', 'quote', '|',
'specialCharacter', 'emoji', '-',
'paragraphStyleWithText', '|',
'fontFamilyWithText', '|',
'fontSizeWithText', '|',
'bold', 'italic', 'underline', 'strike', '|',
'growFont', 'shrinkFont', '|',
'fontColor', 'fontBackgroundColor', '|',
'bulletList', 'numberedList', 'multiLevelList', '|',
'align', '|',
'lineHeight', '|',
'decreaseIndent', 'increaseIndent','customList'
],
'editor.list.customList': [
{
format: 'bullet',
levelText: '▎',
runStyle: {
color: { r: 0, g: 102, b: 204 },
fontSize: { value: 10, unit: 'pt' },
display: 'inline-block',
width: { value: 4, unit: 'px' },
marginLeft: { value: 0, unit: 'px' },
marginRight: { value: 1, unit: 'px' },
paddingLeft: { value: 0, unit: 'px' },
textIndent: { value: 0, unit: 'px' }
}
},
{
format: 'bullet',
levelText: '-',
runStyle: {
color: { r: 30, g: 30, b: 30 },
fontSize: { value: 9, unit: 'pt' },
display: 'inline-block',
width: { value: 6, unit: 'px' },
marginRight: { value: 2, unit: 'px' },
paddingLeft: { value: 0, unit: 'px' },
textIndent: { value: 0, unit: 'px' }
}
},
{
format: 'bullet',
levelText: '·',
runStyle: {
color: { r: 30, g: 30, b: 30 },
fontSize: { value: 9, unit: 'pt' },
display: 'inline-block',
width: { value: 6, unit: 'px' },
marginRight: { value: 2, unit: 'px' },
paddingLeft: { value: 0, unit: 'px' },
textIndent: { value: 0, unit: 'px' }
}
}
]적용 방법
2단계: -
3단계: ·
스타일이 다단계 사용자 목록으로 적용됩니다.
- 색, 간격, 크기는 다음에서 자유롭게 조정합니다:
runStyle.
참고 사항
- 이 설정은 모든 에디터에 함께 적용됩니다.
- 기본 글머리 기호 기능과 함께 씁니다.
- 환경에 따라 추가로 조정이 필요할 수 있습니다.
다만 에디터의 initialized 이벤트에서
toggleRuler 명령을 부르면 켤 수 있습니다.적용 방법
initialized 를 editor.execCommand('toggleRuler') 이벤트에서 부르면에디터가 만들어질 때 눈금자가 자동으로 켜집니다.
|
설명
수식·화학식 편집기 플러그인은 상용 모듈인 MathType을 씁니다.
아래는 Java 버전 MathType을 Synap Editor에 붙이는 예시입니다.
npm으로 붙이려면 다음을 참고하세요: 수식 편집기 사용 안내.
MathType 상용 라이선스는 MathType 팀에 문의하세요:
수식 편집기 안내: /documents/en/plugins/formula-editor
1. 일반 HTML 에디터용 Java MathType 내려받기 (MathType Generic Integration)
쓰는 JDK 버전에 맞는 플러그인을 내려받습니다.
JDK 호환
Java: JDK 11 이하 (1.8 포함)
Java Jakarta : JDK 11 이상
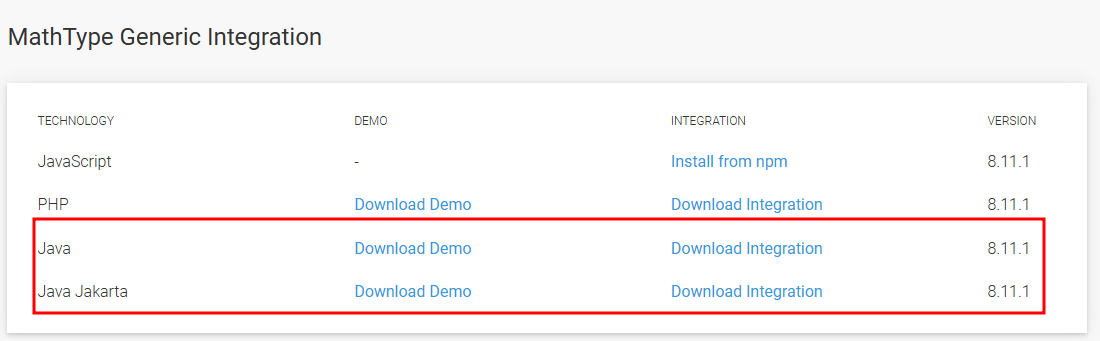
폴더 구성
압축을 풀면 배포용 MathType 엔진인 pluginwiris_engine.war와, 에디터 연동용 JS 파일이 든 generic_wiris 폴더가 들어 있습니다.
2. pluginwiris_engine.war 배포
WAS에 배포
pluginwiris_engine.war를 WAS 서버(JBoss, Tomcat 등)에 배포합니다.
배포 확인
배포한 뒤 아래 주소가 열리는지 확인합니다:
ip:port/pluginwiris_engine/app/configurationjs
e.g.) http://localhost:7070/pluginwiris_engine/app/configurationjs
정상 예시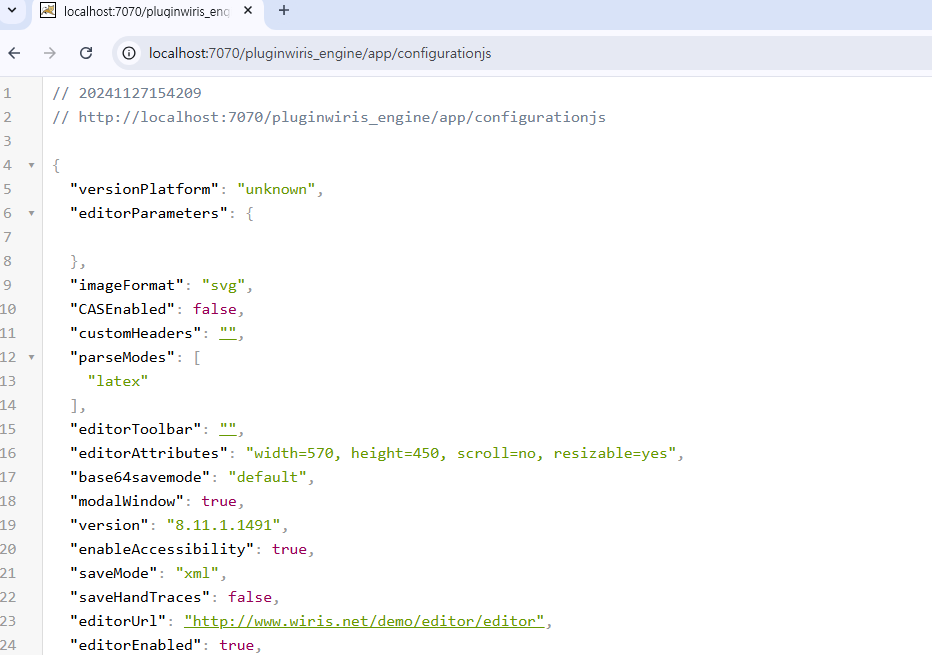
3. 에디터에 붙이기
3.1 플러그인 파일 불러오기
java MathType generic_wiris wirisplugin-generic.js include .
|
3.2 도구 모음 버튼 추가
synapeditor.config.js의 도구 모음에 수식·화학식 버튼을 넣습니다.
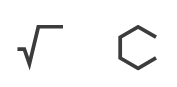
|
3.3 MathType 설정
synapeditor.config.js 아래쪽에 MathType 설정을 넣습니다.
|
설명
Synap Editor 버전을 확인하는 방법입니다.
1. 메뉴에서: 도움말 → Synap Editor 정보
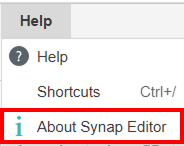
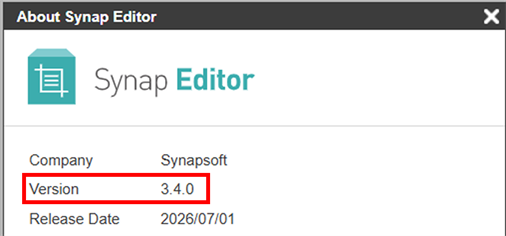
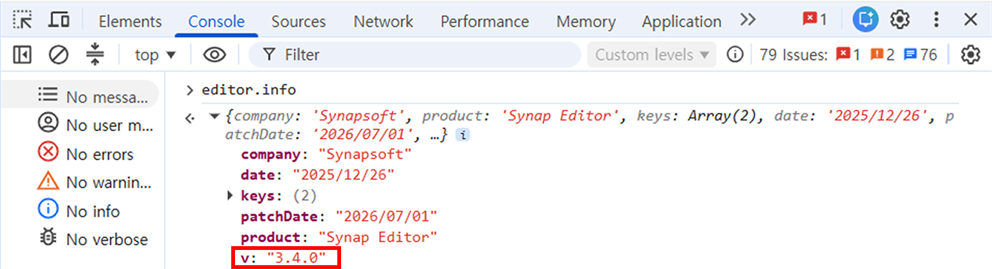
2. 브라우저 콘솔에서 editor.info 쓰기
개발자 도구(F12)를 열고 콘솔 탭에서 아래 명령을 입력합니다.
editor.info
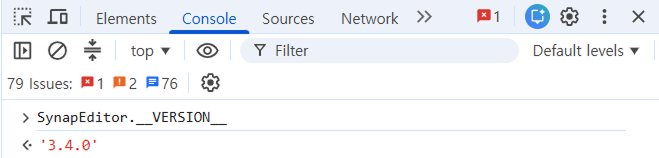
3. SynapEditor.__VERSION__ 쓰기
개발자 도구(F12)를 열고 콘솔 탭에서 아래 명령을 입력합니다.
SynapEditor.__VERSION__
설명
도구 모음이나 메뉴를 없애는 방법입니다.
1. 설정 값을 주석 처리하거나 지우기
도구 모음
도구 모음 설정의 열쇠는 남겨 두고 값만 주석 처리하면 숨겨집니다.
메뉴 표시 여부를 false로 지정합니다.
참고: 설정 열쇠까지 통째로 주석 처리하면 도구 모음이 기본값으로 돌아갑니다.
synapeditor.config.js
|
도구 모음 설정: /documents/en/installation-and-configuration/configuration/basic-ui-settings/toolbar-settings
메뉴 설정: /documents/en/installation-and-configuration/configuration/basic-ui-settings/menu-settings
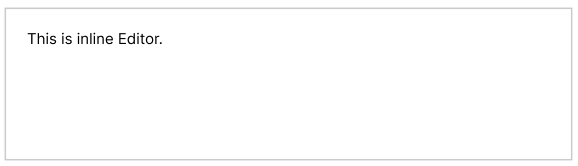
2. 인라인 모드 쓰기
에디터를 인라인 모드로 바꾸면 도구 모음과 메뉴 없이 쓸 수 있습니다.
|
인라인 에디터 결과:
설명
자주 쓰는 특수문자나 이모지를
이모지를 도구 모음이나 빠른 삽입 메뉴에
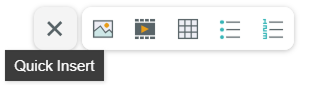 사용자 플러그인으로 넣을 수 있습니다.
사용자 플러그인 안내: /documents/en/plugins/custom-plugin
사용자 플러그인 만들기
BoxDrawingLeft.js
|
플러그인 파일 불러오기
|
synapeditor.config.js에 등록
synapeditor.config.js Toolbar.
도구 모음 설정
|
빠른 삽입 설정
|
데모
설명
자주 쓰는 기능에 단축키를 지정할 수 있습니다. 기본 단축키 목록은 Ctrl+/(Windows) 또는 Cmd+/(Mac)로 봅니다.
새 단축키가 기존 것과 겹치면 새 단축키가 우선합니다.
단축키는 사용자 플러그인으로 설정합니다.
사용자 플러그인 안내: /documents/en/plugins/custom-plugin
기본 단축키 설정
Windows와 Mac/Linux 환경에 각각 단축키를 정합니다.
|
쓸 수 있는 키 전체 목록은 안내 문서를 보세요.
옵션 설정
action : 실행할 Action (참고: Actions)
params : action에 넘길 값입니다.
onExecute : 3.3.0 버전부터
focusItem : 실행 뒤 대상에 초점을 줄지 (기본값: true)
|
예시: 양식 요소 단축키
자주 쓰는 양식 요소에 단축키를 지정하는 예시입니다.
양식 요소 편집기 플러그인 안내: /documents/en/plugins/form-editor
1. 양식 요소 편집기 플러그인 불러오기
HTML에서 양식 요소 편집기 플러그인 파일을 불러옵니다.
|
2. 사용자 플러그인으로 단축키 지정
쓸 수 있는 action 목록: /documents/en/plugins/form-editor(Actions 참고)
예시: 라디오 버튼과 텍스트 입력칸 단축키.
|
사용자 단축키 플러그인 파일(예: shortcut.js)을 불러옵니다:
|
3. 단축키 확인
설명
실시간 공동 편집이 끊기지 않도록 웹 서버 두 대와 프록시로 active-passive 이중화를 구성하는 예시입니다.
이 예시는 active-passive 방식을 씁니다.
※ active-passive 방식: 한 대가 주 서버로 모든 요청을 받고, 다른 한 대는 대기하다가 주 서버가 멈출 때만 넘겨받습니다.
시험 환경
linux - rocky 9.4
HAProxy
node(v20.16.0) - PM2
설정과 코드
1. synapeditor.config.js
|
HTML 설정
예제 HTML 파일: 첨부한 collabo.html을 보세요
2. HAProxy 설치와 설정
HAProxy 설치
|
HAProxy 설정 파일(/etc/haproxy/haproxy.cfg)을 고칩니다
|
서비스 시작
|
서비스 상태 확인
|
3. PM2로 WebSocket 서버 띄우기
Node.js가 설치돼 있어야 합니다.
실시간 공동 편집 WebSocket 서버 설정 안내: /documents/en/plugins/collaboration/node-server-guide
PM2 설치
|
WebSocket 서버 시작
|
WebSocket 상태 확인
|
WebSocket 서버 살펴보기
|
설명
표에서 계산할 때 JavaScript의 부동소수점 연산 때문에 뜻하지 않은 자릿수가 나올 수 있습니다
(예: 0.30000000000000004). 고치는 방법을 안내합니다.
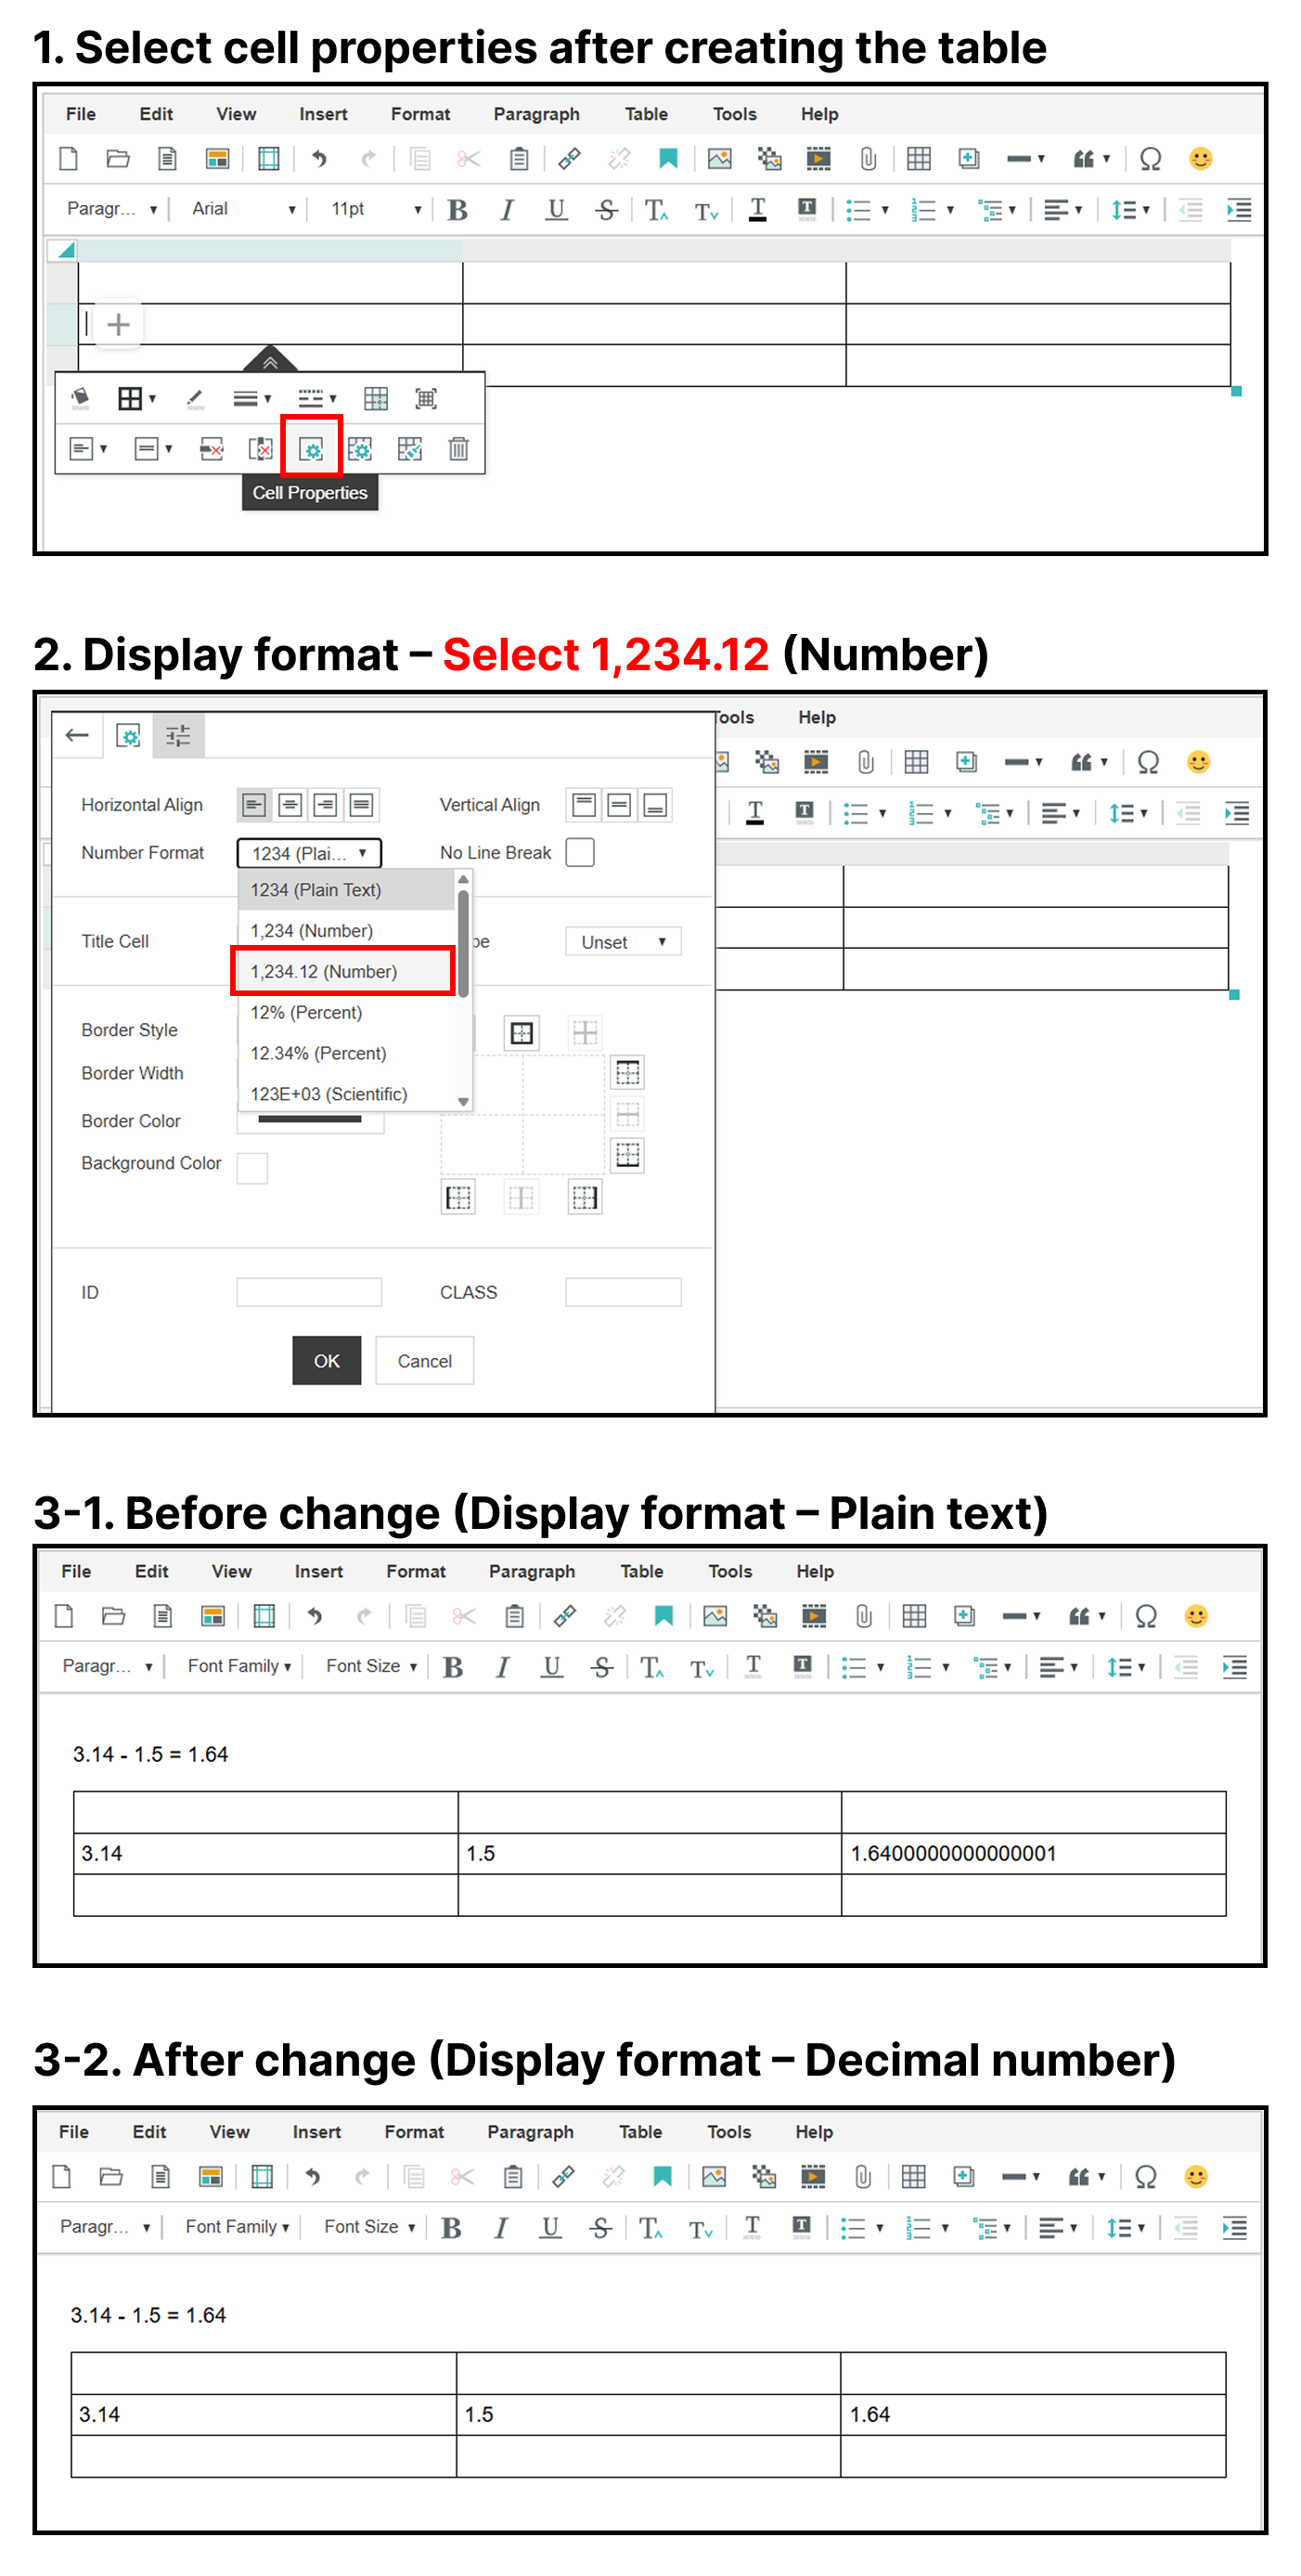
셀 표시 형식을 소수로 바꾸면 부동소수점 오차가 없어집니다.
※ 셀 소수 형식은 에디터 3.3.0 버전 부터 지원합니다.
코드
표를 만들 때 셀 표시 형식을 일반 텍스트에서 소수로 바꿉니다(모든 표에 적용):
function SynapEditorAfterEdit(e) {
    let tableId;
    if(e.actionName =="insertTable") {
        console.log(e)
        tableId = e.targetIds
        const table = document.querySelector(`table[data-paragraph-id="${tableId}"]`);
        if (table) {
            // Select all td elements
            const tdElements = table.querySelectorAll('td');
            // Add attributes to each td
            tdElements.forEach(td => {
                td.setAttribute('data-number-format-code', '#,##0.00');
                td.setAttribute('data-number-format-id', '4');
            });
            editor.updateBodyModel();
        }
    }
}
표를 만든 뒤 직접 바꾸려면:
표 셀 속성 → 표시 형식 → 소수
설명
에디터의 특정 표에 CSS 클래스를 넣는 방법입니다.
커서가 놓인 표에 클래스를 넣습니다.
코드
경우 1: iframe 모드 = false
let tableid;
if(editor.getSelection().start.getType() == 'cell') {
    tableid = editor.getSelection().start.tableId;
} else {
    const pEl = editor.getSelection().start.id;
    const findid = document.getElementById(pEl);
    tableid = findid.closest('table').id;
}
if (tableid) {
    const tableElement = document.getElementById(tableid);
    tableElement.classList.add('table1'); // Specify the class name to add
}
editor.updateBodyModel();
경우 2: iframe 모드 = true
// Select the iframe element
const iframe = document.querySelector('iframe.se-contents-edit');
// Verify the iframe was selected correctly
if (!iframe) {
    console.error('Cannot find the iframe element.');
} else {
    // Access the iframe document
    const iframeDocument = iframe.contentDocument || iframe.contentWindow.document;
    let tableid;
    if (editor.getSelection().start.getType() == 'cell') {
        tableid = editor.getSelection().start.tableId;
    } else {
        const pEl = editor.getSelection().start.id;
        const findid = iframeDocument.getElementById(pEl); // Find the element inside the iframe
        tableid = findid.closest('table').id;
    }
    if (tableid) {
        const tableElement = iframeDocument.getElementById(tableid); // Find the table inside the iframe
        tableElement.classList.add('table1'); // Specify the class name to add
    }
}
editor.updateBodyModel();
경우 3: if 문으로 iframe 존재를 확인
// Select the iframe element
const iframe = document.querySelector('iframe.se-contents-edit');
let tableid;
let documentToUse = document;
if (iframe) {
    // If iframe exists, access it
    const iframeDocument = iframe.contentDocument || iframe.contentWindow.document;
    if (!iframeDocument) {
        console.error('Cannot access the iframe document.');
    }
    documentToUse = iframeDocument;
}
// When no iframe element exists
if (editor.getSelection().start.getType() == 'cell') {
    tableid = editor.getSelection().start.tableId;
} else {
    const pEl = editor.getSelection().start.id;
    const findid = documentToUse.getElementById(pEl);
    if (!findid) {
        console.error('Cannot find the selected element.');
    }
    tableid = findid.closest('table').id;
}
if (tableid) {
    const tableElement = documentToUse.getElementById(tableid);
    tableElement.classList.add('table1'); // Specify the class name to add
}
editor.updateBodyModel();
참고 API: /documents/api/synapeditor?version=latest#getselection
예시
글자 크기 바꾸기
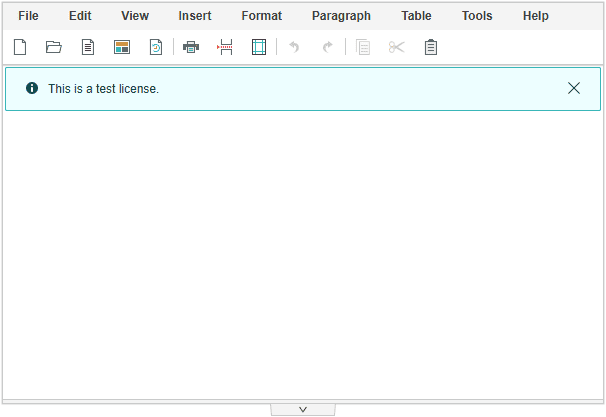
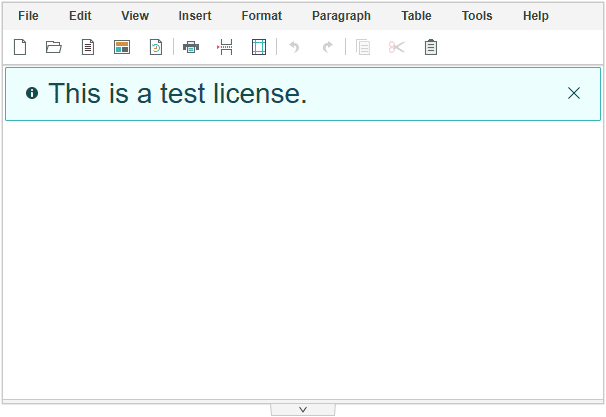
.se-notification-text에 font-size와 line-height를 지정합니다.
.se .se-notification-text {
    font-size: 28px !important;
    line-height: 28px !important; /* Set to the same value as font-size */
}
적용 전 | 적용 후 |
|---|---|
|
|
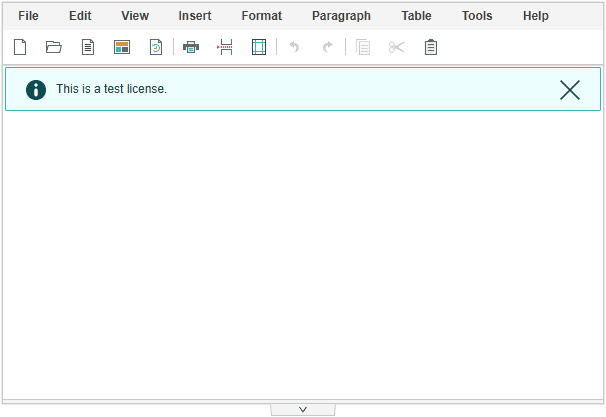
아이콘 크기 바꾸기
.se-notification-icon(앞 아이콘)과 .se-notification-close(닫기 버튼)의 width와 height를 바꿉니다.
.se-notification-text의 width도 함께 맞춥니다.
.se .se-notification-icon, .se .se-notification-close {
    width: 20px !important;
    height: 20px !important;
}
.se .se-notification-text {
    /* calc 100% :
       20px: width
       20px: width
       25px:
    */
    width: calc(100% - (20px + 20px + 25px)) !important;
}
적용 전 | 적용 후 |
|---|---|
|
|
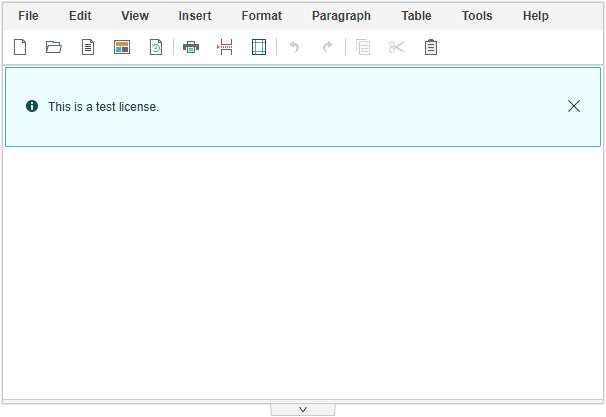
알림 높이 키우기
.se-notification-layer에 padding-top과 padding-bottom을 지정합니다.
.se .se-notification-layer {
    padding-top: 30px !important;
    padding-bottom: 30px !important;
}
적용 전 | 적용 후 |
|---|---|
|
|
사이트가 HTTPS를 쓴다면 실시간 공동 편집을 켜려면 SSL 설정이 필요합니다.
아래는 웹 서버로 Apache를 쓸 때의 프록시 설정 예시입니다.
공동 편집 서버가 11000 포트에서 동작한다고 가정합니다.
httpd.conf : 프록시 모듈 켜기
LoadModule proxy_module modules/mod_proxy.so
LoadModule proxy_http_module modules/mod_proxy_http.so
LoadModule proxy_wstunnel_module modules/mod_proxy_wstunnel.so
conf.d/ssl.conf
Listen 12000 https가상 호스트 파일(예: collabo.synapsoft.com.conf)을 만들어 설정합니다:
Define DOMAIN synapsoft.co.kr
<VirtualHost *:12000>
    ServerName collabo.synapsoft.com
    ErrorLog logs/ssl_error_log
    TransferLog logs/ssl_access_log
    LogLevel warn
    SSLEngine on
    SSLProtocol all -SSLv2 -SSLv3
    SSLCipherSuite HIGH:3DES:!aNULL:!MD5:!SEED:!IDEA
    SSLCertificateFile /etc/httpd/ssl/cert.pem
    SSLCertificateKeyFile /etc/httpd/ssl/rsakey.pem
    SSLCertificateChainFile /etc/httpd/ssl/DigiCertCA.pem
    <Files ~ "\.(cgi|shtml|phtml|php3?)$">
        SSLOptions +StdEnvVars
    </Files>
    ProxyPreserveHost On
    ProxyPass / ws://192.168.23.82:11000/
    ProxyPassReverse / ws://192.168.23.82:11000/
    <Proxy *>
        Require all granted
    </Proxy>
    BrowserMatch "MSIE [2-5]" \
         nokeepalive ssl-unclean-shutdown \
         downgrade-1.0 force-response-1.0
    CustomLog logs/ssl_request_log \
          "%t %h %{SSL_PROTOCOL}x %{SSL_CIPHER}x \"%r\" %b"
</VirtualHost>에디터로 넣은 <a> 태그에 클래스를 붙이는 예시입니다.
그 클래스를 서비스의 다른 곳에서 참조해야 할 때 쓸 만합니다.
예제 코드
function SynapEditorAfterEdit(e) {
    if(e.actionName=="insertLink"){
        var pTag = document.getElementById(e.targetIds[0]);
        var anchorTag = pTag.getElementsByTagName('a')[0];
        anchorTag.classList.add('new-class');
        editor.updateModel(e.targetIds[0]);   // dom model update
    }
}
쓰는 API
SynapEditorAfterEdit: /documents/en/api/events/afterEdit
updateModel: /documents/en/api/editor-object/updateModel
일반 사용자가 소스 보기로 부분 편집 제한을 직접 거는 것은 어렵습니다.
설명서:/documents/en/installation-and-configuration/configuration/other-settings/partial-edit-restriction
대신 버튼을 만들어 코드로 제한을 걸 수 있습니다.
아래 데모는 개발자 콘솔로 부분 편집 제한을 거는 방법입니다.
예제 코드
var td = editor.getTableCellHTMLElement();
editor.setLock('#'+td.id);
쓰는 API
getTableCellHTMLElement: /documents/en/api/editor-object/getTableCellHTMLElement
표를 넣은 뒤에 클래스를 붙여야 할 때가 있습니다.
한 가지 방법입니다.
예제 코드
function SynapEditorAfterEdit(e) {
    if(e.actionName === 'insertTable'){   // Description
        var obj = editor.getAPIModels()[0];// Get the paragraph ID of the inserted element
        var pid = obj.id;
        var table = editor.getAPIModelsBySelector('table[data-paragraph-id="'+pid+'"')[0];   // Find the table by paragraph ID
        table.addClass('your-class-name');// Add class to the table
    }
}
쓰는 API
SynapEditorAfterEdit: /documents/en/api/events/afterEdit
getAPIModels: /documents/en/api/editor-object/getAPIModels
getAPIModelsBySelector: /documents/en/api/editor-object/getAPIModelsBySelector
addClass: /documents/en/api/api-model/Element#Element-addClass
Synap Editor의 가져오기 기능이 제대로 동작하지 않으면 명령줄에서 시험해 볼 수 있습니다.
아래에 없는 오류는 사이냅소프트 기술지원으로 문의해 주세요.
문의: 문의 양식
전화: 02-2039-3782
shell> /home/synap/sedocConverter_exe -f [font directory] [source file path] [output directory] [temp directory]

ex)
shell> /home/synap/sedocConverter_exe -f /home/test/fonts /home/synap/test.hwp /home/synap/result /home/sgacorp/temp
반환 코드 | 설명 |
|---|---|
0 | 성공 |
2 | 지원하지 않는 형식 |
3 | 암호가 걸린 문서 (지원 안 함) |
4 | 대상 경로가 너무 김 |
161 | 변환 실패 |
252 | 라이선스 키가 올바르지 않음 |
253 | CPU 개수 한도 초과 |
254 | 라이선스 만료 |
255 | 알 수 없는 오류 |
웹폰트는 다음과 같이 설정합니다.
1. HTML에 폰트 스타일시트를 넣습니다:
<link rel="stylesheet" href="https://fonts.googleapis.com/css?family=YourFontName">2. synapeditor.config.js에 폰트 이름을 넣습니다:
/**
 * Defines the font families available for editing.
 */
'editor.fontFamily': {
    'ko': [
        'Arial', 'Comic Sans MS', 'Courier New', 'Georgia',
        'Lucida Sans Unicode', 'Tahoma', 'Times New Roman', 'Trebuchet MS', 'Verdana', 'your-web-font-name'
    ],
}연동한 뒤 소스 보기 화면이 아래처럼 에디터 상자 밖으로 넘칠 때가 있습니다.
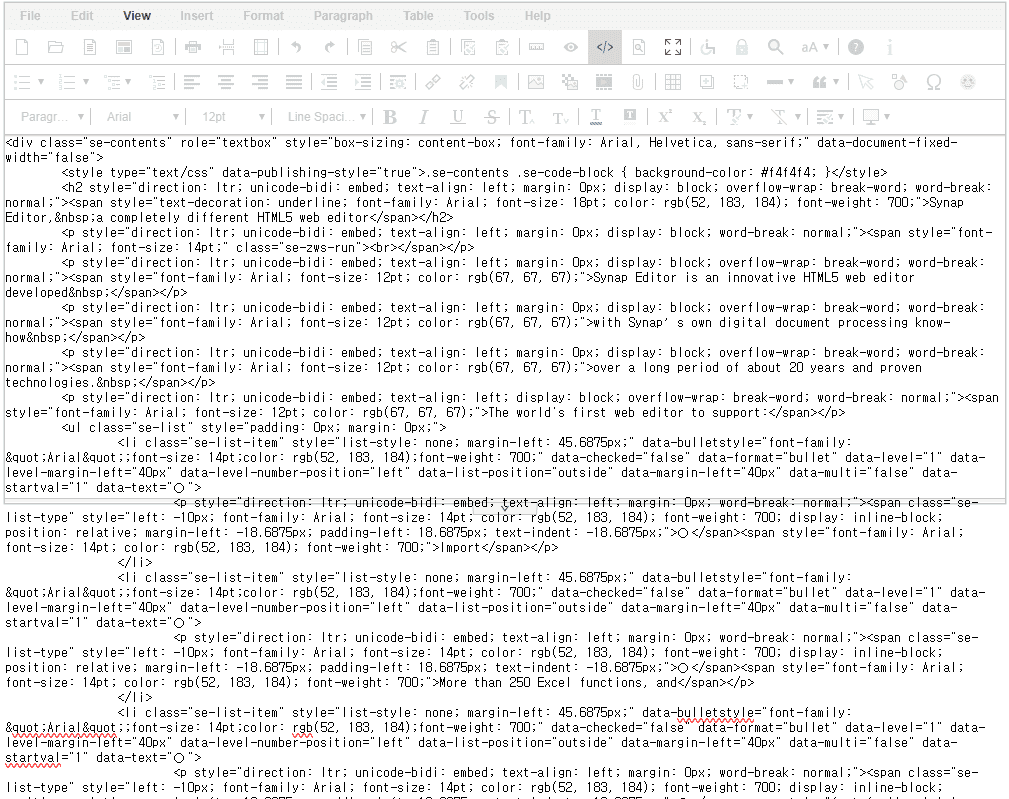
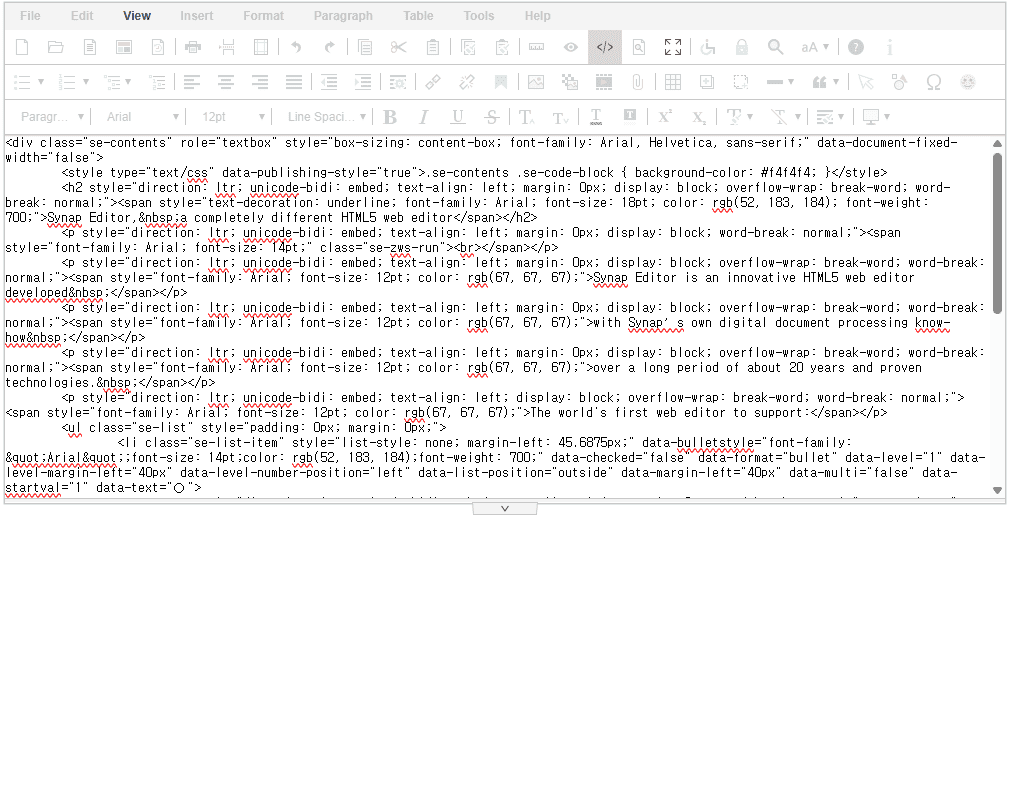
고치는 방법은 두 가지입니다.
방법 1) html 다음 코드를 더하거나 고칩니다 css
.se-code-viewer { overflow: auto; }방법 2) CodeMirror
설명서: : /documents/en/external-modules/code-mirror
고친 뒤 모습:
Synap Editor는 도구 모음과 메뉴 막대를 숨긴 뒤 미리보기 모드로 바꾸는 것을 지원합니다.
도구 모음과 메뉴 막대에 display:none을 줍니다:
|
그다음 setMode API로 미리보기 모드로 바꿉니다:
|
데모
쓰는 API
기본값에서는 Tab을 누르면 초점이 메뉴 항목을 따라 옮겨 갑니다.
Tab을 눌렀을 때 본문으로 바로 가게 하려면 focusIme 명령을 씁니다.
Synap Editor는 이를 위해 focusIme API를 제공합니다.
설명서:/documents/en/api/actions/selection
// Move focus to the editor body
editor.execCommand('focusIme', false);
// Move focus and scroll to the editor body
editor.execCommand('focusIme', true);
Tab을 처음 누를 때 본문으로 초점이 가게 하려면 다음을 넣습니다:
document.querySelector('.se .se-toolbar button.se-clickable').addEventListener('focus', () => {
  editor.execCommand('focusIme');
}, {once: true})Synap Editor에는 안내 문구 기능이 따로 없습니다. 다만 아래 예제처럼 코드를 더하면 같은 효과를 낼 수 있습니다.
synapeditor.config.js
// Define the placeholder CSS
.se.editorPlaceHolder .se-contents > p:after {
  content: 'Enter your content here.' !important;
  color: #999 !important;
}
// /documents/en/api/events/afterEdit
editor.setEventListener('afterEdit', function(e) {
  if (editor.isEmpty()) {
    editor.getElement().addClass('editorPlaceHolder');
  } else {
    editor.getElement().removeClass('editorPlaceHolder');
  }
})
안내 문구 안에서 줄을 바꿔야 하면:
.se.editorPlaceHolder .se-contents > p:after {
  content: 'Enter your\A content here.' !important;
  color: #999 !important;
  white-space: pre !important;
}Synap Editor는 UTF-8 인코딩을 씁니다. 서버가 EUC-KR을 쓴다면 문자 집합을 명시해야 합니다.
웹 서버는 보통 다음 태그로 문자 집합을 선언합니다 meta charset 태그:
<html>
  <head>
    <meta charset="UTF-8">
  </head>
</html>
에디터 스크립트를 불러올 때도 charset="UTF-8" 속성을 다음 태그에 함께 넣습니다 <script> 태그:
<!DOCTYPE html>
<html lang="en">
<head>
  <meta charset="utf-8">
  <meta http-equiv="X-UA-Compatible" content="IE=edge">
  <meta name="viewport" content="width=device-width, initial-scale=1.0, minimum-scale=1.0,
        maximum-scale=1.0, user-scalable=no, shrink-to-fit=no">
  <title>Synap Editor</title>
  <link href="/js/SynapEditor/synapeditor.min.css" rel="stylesheet" type="text/css">
  <script src="/js/SynapEditor/synapeditor.config.js" charset="UTF-8"></script>
  <script src="/js/SynapEditor/synapeditor.min.js" charset="UTF-8"></script>
  <script>
    function initEditor() {
      new SynapEditor('SynapEditor1', synapEditorConfig);
    }
  </script>
</head>
<body onload="initEditor();">
  <div id="SynapEditor1"></div>
</body>
</html>Synap Editor는 편집 영역의 기본 스타일(글꼴 이름, 글자 크기, 줄 간격, 문단 간격 등)을 설정할 수 있습니다.
기본 문단 크기를 정하려면 Paragraph 아래의 요소를 설정합니다: editor.defaultStyle.
synapeditor.config.js
/**
 * Defines the default styles used in the editor.
 * Only the elements listed below are configurable; values are written as cssText strings.
 * Supported elements:
 *   'Body', 'Paragraph', 'TextRun', 'Div', 'Image', 'Video', 'List', 'ListItem',
 *   'Quote', 'Table', 'TableRow', 'TableCell', 'HorizontalLine', 'Iframe',
 *   'Heading1', 'Heading2', 'Heading3', 'Heading4', 'Heading5', 'Heading6'
 */
'editor.defaultStyle': {
  'Body': 'font-family: Arial; font-size: 11pt; line-height: 1.2;'
},Synap Editor는 특정 영역의 편집을 제한하는 기능을 제공합니다.
설명서: /documents/en/api/editor-object/setLock
잠금 기능이 켜지면 에디터에 잠금 아이콘이 나타납니다. 다음 CSS로 숨길 수 있습니다:
.se:not(#se-t).se-edit-mode .se-main .se-contents-edit .se-contents .se-lock:after,
.se:not(#se-t).se-edit-mode .se-main .se-contents-edit .se-contents .se-unlock:after {
  content: '';
}
참고: iframe 모드에서는 CSS를 iframe 안에 적용해야 합니다.
/documents/en/installation-and-configuration/configuration/basic-ui-settings/iframe-mode
1단계. 이벤트 속성 넣기를 켭니다
synapeditor.config.js
// Allow event attributes such as onclick, onload, onchange, etc.
'editor.contentFilter.allowEventAttribute': true
2단계. 요소에 속성을 넣습니다
// Insert an img element into the editor
var html = "<img id='sample' src='https://synapeditor.com/wp-content/uploads/2019/08/newvalue_01.png' style='width:50px; height:50px;'>";
editor.insertHTML(html);
// Retrieve the image model
var image = editor.getAPIModelById('sample');
// Add the desired event attribute
image.setAttribute('onerror', 'http://sample.co.kr');
// REQUIRED: sync the editor model
editor.updateModel('sample');Synap Editor는 HTML을 만드는 것 말고도, 내용을 글자만으로 뽑아내는 API를 제공합니다.
getTextContent API : 에디터 내용을 글자만으로 뽑아냅니다.
API 설명서: /documents/en/api/editor-object/getTextContent
참고: 다음으로 뽑은 글에는 getTextContent 줄바꿈이 들어 있지 않습니다.
XSS(Cross-Site Scripting)는 관리자가 아닌 사람이 게시글 같은 웹 콘텐츠에 악성 스크립트를 심는 공격입니다.
Synap Editor는 게시글에 스크립트가 심기지 않도록 콘텐츠 필터를 내장하고 있습니다. 설정 파일에 다음을 지정하세요:
synapeditor.config.js
/**
 * Controls filtering of <iframe> tags.
 */
'editor.contentFilter.allowIframe': false,
/**
 * Controls filtering of <script> tags.
 */
'editor.contentFilter.allowScript': false,
/**
 * Controls filtering of event attributes on HTML tags (e.g., onclick).
 */
'editor.contentFilter.allowEventAttribute': false,
/**
 * Controls filtering of <link> tags.
 */
'editor.contentFilter.allowLink': false,
이 항목들을 false 로 두거나 빼면 해당 콘텐츠가 막힙니다. true 로 두면 필터를 통과합니다.
흔한 원인은 두 가지입니다:
1. 도메인이 바뀐 경우
Synap Editor 라이선스는 도메인마다 발급됩니다. 도메인이 바뀌었다면 새 라이선스를 요청해야 합니다.
2. 라이선스 파일을 바꾼 뒤 오류가 나는 경우
최신 버전으로 올리고 예전 라이선스 파일을 그대로 쓰면 오류가 납니다. (예전 파일에는 새 버전과 맞지 않는 업데이트 만료일이 들어 있습니다.)
이때는 최신 버전 에디터에 함께 들어 있는 license.json 파일을 쓰세요.
이미지를 올리면 Synap Editor는 원래 DPI를 지킵니다. 다만 이미지가 에디터 상자보다 넓으면 상자에 맞춰 줄어듭니다.
에디터 너비와 상관없이 원래 크기 그대로 보이게 하려면 다음 afterUploadImage 이벤트에서 width와 height 제한을 지웁니다:
editor.setEventListener('afterUploadImage', function(e) {
  setTimeout(function() {
    var img = editor.getAPIModelById(e.elementId);
    img.setWidth(null);
    img.setHeight(null);
  }, 0);
})가져오기 기능은 아래 순서로 설정합니다.
1단계. synapeditor.config.js에 API 주소를 지정합니다
{
  'editor.import.api': '/importDoc.do',
}
2단계. synapeditor.config.js에 허용할 확장자를 지정합니다
{
  'editor.import.extensions': ['docx', 'doc', 'hwp', 'hml', 'html', 'htm', 'txt', 'xls', 'xlsx', 'pptx', 'ppt', 'odt'],
}
3단계. 서버 쪽 처리기를 만듭니다 (Java Spring Framework 예시)
import org.springframework.stereotype.Controller;
import org.springframework.web.bind.annotation.*;
import org.springframework.web.multipart.MultipartFile;
import javax.servlet.http.HttpServletRequest;
import java.io.*;
import java.util.*;
import java.util.zip.InflaterInputStream;
@Controller
public class ImportController {
  static String DOC_UPLOAD_DIR_REL_PATH = "uploads" + File.separator + "docs";
  static String OUTPUT_DIR_REL_PATH = "uploads" + File.separator + "output";
  @RequestMapping(value = "/importDoc.do", method = RequestMethod.POST)
  @ResponseBody
  public Map<String, Object> importDoc(HttpServletRequest request,
      @RequestParam("file") MultipartFile importFile) throws IOException {
    String ROOT_ABS_PATH = request.getSession().getServletContext().getRealPath("");
    String UPLOAD_DIR_ABS_PATH = ROOT_ABS_PATH + File.separator + DOC_UPLOAD_DIR_REL_PATH;
    makeDirectory(UPLOAD_DIR_ABS_PATH);
    String fileName = importFile.getOriginalFilename();
    String inputFileAbsPath = UPLOAD_DIR_ABS_PATH + File.separator + fileName;
    writeFile(inputFileAbsPath, importFile.getBytes());
    // Create a unique output directory for each file
    Calendar cal = Calendar.getInstance();
    String yearMonth = String.format("%04d%02d", cal.get(Calendar.YEAR), cal.get(Calendar.MONTH) + 1);
    String uuid = UUID.randomUUID().toString();
    String worksDirAbsPath = ROOT_ABS_PATH + File.separator + OUTPUT_DIR_REL_PATH
        + File.separator + yearMonth + File.separator + uuid;
    makeDirectory(worksDirAbsPath);
    // Run the document converter
    executeConverter(inputFileAbsPath, worksDirAbsPath);
    // Delete the original upload after conversion
    deleteFile(inputFileAbsPath);
    // Read and serialize the converted .pb file
    // Note: Since v2.3.0, the filename changed from document.word.pb to document.pb
    String pbAbsPath = worksDirAbsPath + File.separator + "document.pb";
    Integer[] serializedData = serializePbData(pbAbsPath);
    // Delete the .pb file
    deleteFile(pbAbsPath);
    Map<String, Object> map = new HashMap<String, Object>();
    map.put("serializedData", serializedData);
    // Return a browser-accessible path via importPath.
    // Adjust to match your OUTPUT_DIR_REL_PATH.
    map.put("importPath", "uploads/output/" + yearMonth + "/" + uuid);
    return map;
  }
  public static int executeConverter(String inputFilePath, String outputFilePath) {
    String SEDOC_CONVERTER_DIR_ABS_PATH = "/path/to/converter/directory";
    String FONT_DIR_ABS_PATH = SEDOC_CONVERTER_DIR_ABS_PATH + File.separator + "fonts";
    String TEMP_DIR_ABS_PATH = SEDOC_CONVERTER_DIR_ABS_PATH + File.separator + "temp";
    String SEDOC_CONVERTER_ABS_PATH = SEDOC_CONVERTER_DIR_ABS_PATH + File.separator + "sedocConverter_exe";
    // For Windows: use "sedocConverter.exe" instead
    makeDirectory(TEMP_DIR_ABS_PATH);
    makeDirectory(FONT_DIR_ABS_PATH);
    String[] cmd = { SEDOC_CONVERTER_ABS_PATH, "-f", FONT_DIR_ABS_PATH,
        inputFilePath, outputFilePath, TEMP_DIR_ABS_PATH };
    try {
      Timer t = new Timer();
      Process proc = Runtime.getRuntime().exec(cmd);
      TimerTask killer = new TimeoutProcessKiller(proc);
      t.schedule(killer, 20000); // Kill if conversion exceeds 20 seconds
      int exitValue = proc.waitFor();
      killer.cancel();
      return exitValue;
    } catch (Exception e) {
      e.printStackTrace();
      return -1;
    }
  }
  // ... (serializePbData, writeFile, deleteFile, makeDirectory, TimeoutProcessKiller helpers)
}공유 설정 객체를 깊은 복사한 뒤 각각 고쳐서 초기화하면 에디터마다 다른 설정을 줄 수 있습니다.
먼저 에디터 초기화 과정을 확인하세요:
/documents/en/installation-and-configuration/configuration/editor-initialization
예시: 초기화할 때 서로 다른 설정을 적용하기
<!DOCTYPE html>
<html lang="en">
<head>
  <meta charset="utf-8">
  <meta http-equiv="X-UA-Compatible" content="IE=edge">
  <meta name="viewport" content="width=device-width, initial-scale=1.0, minimum-scale=1.0,
        maximum-scale=1.0, user-scalable=no, shrink-to-fit=no">
  <title>Synap Editor</title>
  <link href="/js/SynapEditor/synapeditor.min.css" rel="stylesheet" type="text/css">
  <script src="/js/SynapEditor/synapeditor.config.js"></script>
  <script src="/js/SynapEditor/synapeditor.min.js"></script>
  <script>
    function initEditor() {
      // Deep-copy the shared config for each instance to avoid cross-contamination
      var config1 = JSON.parse(JSON.stringify(synapEditorConfig));
      var config2 = JSON.parse(JSON.stringify(synapEditorConfig));
      var config3 = JSON.parse(JSON.stringify(synapEditorConfig));
      config1['editor.size.height'] = '300px';
      config2['editor.size.height'] = '500px';
      config3['editor.size.height'] = '700px';
      new SynapEditor('SynapEditor1', config1);
      new SynapEditor('SynapEditor2', config2);
      new SynapEditor('SynapEditor3', config3);
    }
  </script>
</head>
<body onload="initEditor();">
  <div id="SynapEditor1"></div>
  <div id="SynapEditor2"></div>
  <div id="SynapEditor3"></div>
</body>
</html>서버로 이미지를 올리려면 아래 순서를 따르세요.
1단계. synapeditor.config.js에 API 주소를 지정합니다
{
  'editor.upload.image.api': '/uploadImage.do',
}
2단계. synapeditor.config.js에 허용할 확장자를 지정합니다
{
  'editor.upload.image.extensions': ['jpg', 'gif', 'png', 'jpeg'],
}
3단계. 서버 쪽 처리기를 만듭니다 (Java Spring Framework 예시)
import org.springframework.stereotype.Controller;
import org.springframework.web.bind.annotation.*;
import org.springframework.web.multipart.MultipartFile;
import javax.servlet.http.HttpServletRequest;
import java.io.*;
import java.util.*;
@Controller
public class UploadController {
  static String IMAGE_UPLOAD_DIR_REL_PATH = "uploads";
  @RequestMapping(value = "/uploadImage.do", method = RequestMethod.POST)
  @ResponseBody
  public Map<String, Object> uploadFile(HttpServletRequest request,
      @RequestParam("file") MultipartFile file) throws IOException {
    String ROOT_ABS_PATH = request.getSession().getServletContext().getRealPath("");
    String UPLOAD_DIR_ABS_PATH = ROOT_ABS_PATH + File.separator + IMAGE_UPLOAD_DIR_REL_PATH;
    makeDirectory(UPLOAD_DIR_ABS_PATH);
    String fileName = file.getOriginalFilename();
    String ext = "";
    String contentType = file.getContentType();
    if (contentType != null) {
      ext = "." + contentType.substring(contentType.lastIndexOf('/') + 1);
    } else if (fileName.lastIndexOf('.') > 0) {
      ext = fileName.substring(fileName.lastIndexOf('.'));
    }
    // Normalize .jpeg to .jpg
    if (ext.indexOf(".jpeg") > -1) {
      ext = ".jpg";
    }
    String saveFileName = UUID.randomUUID().toString() + ext;
    String saveFileAbsPath = UPLOAD_DIR_ABS_PATH + File.separator + saveFileName;
    writeFile(saveFileAbsPath, file.getBytes());
    Map<String, Object> map = new HashMap<String, Object>();
    // Return a browser-accessible path in uploadPath
    map.put("uploadPath", "uploads/" + saveFileName);
    return map;
  }
  private static void writeFile(String path, byte[] bytes) throws IOException {
    OutputStream os = null;
    try {
      os = new FileOutputStream(path);
      os.write(bytes);
    } finally {
      if (os != null) os.close();
    }
  }
  private static void makeDirectory(String dirPath) {
    File dir = new File(dirPath);
    if (!dir.exists()) {
      dir.mkdir();
    }
  }
}보통 이미지가 서버에 제대로 올라가지 않은 경우입니다. 아래를 차례로 확인하세요.
확인 1. 이미지 주소가 200 OK를 돌려주는지 봅니다
브라우저 개발자 도구의 네트워크 탭에서 이미지 요청이 200 OK 상태 코드를 돌려주는지 확인합니다.
확인 2. 200 OK가 아니면 서버에 파일이 있는지 봅니다
shell> cd [installation directory]
shell> cd webapp/w2/editor/uploads/images/
shell> ls -al
9f7b27a9ab459f6f4e7cd0baadce4d3bba5d4930.jpg
확인 3. 파일이 있다면 연동 코드를 봅니다
응답 map에 주소 경로가 제대로 들어가는지 확인합니다:
Map<String, Object> map = new HashMap<String, Object>();
// Pass a browser-accessible path via uploadPath.
// Adjust this to match your image upload directory.
String uploadFile = "9f7b27a9ab459f6f4e7cd0baadce4d3bba5d4930.jpg";
map.put("uploadPath", "webapp/w2/editor/uploads/images/" + uploadFile);